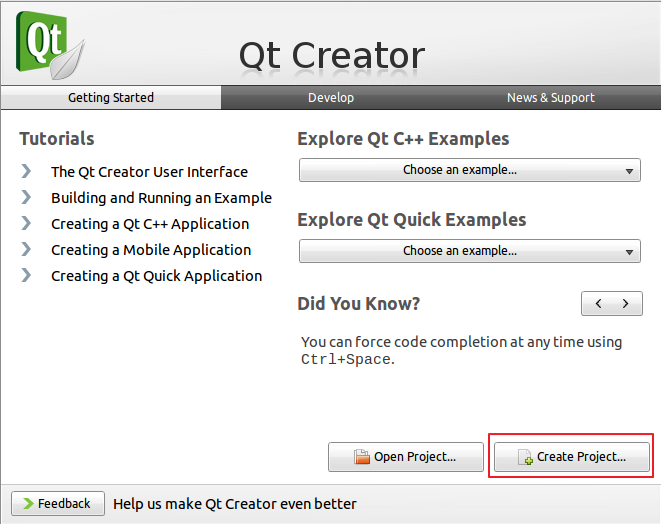
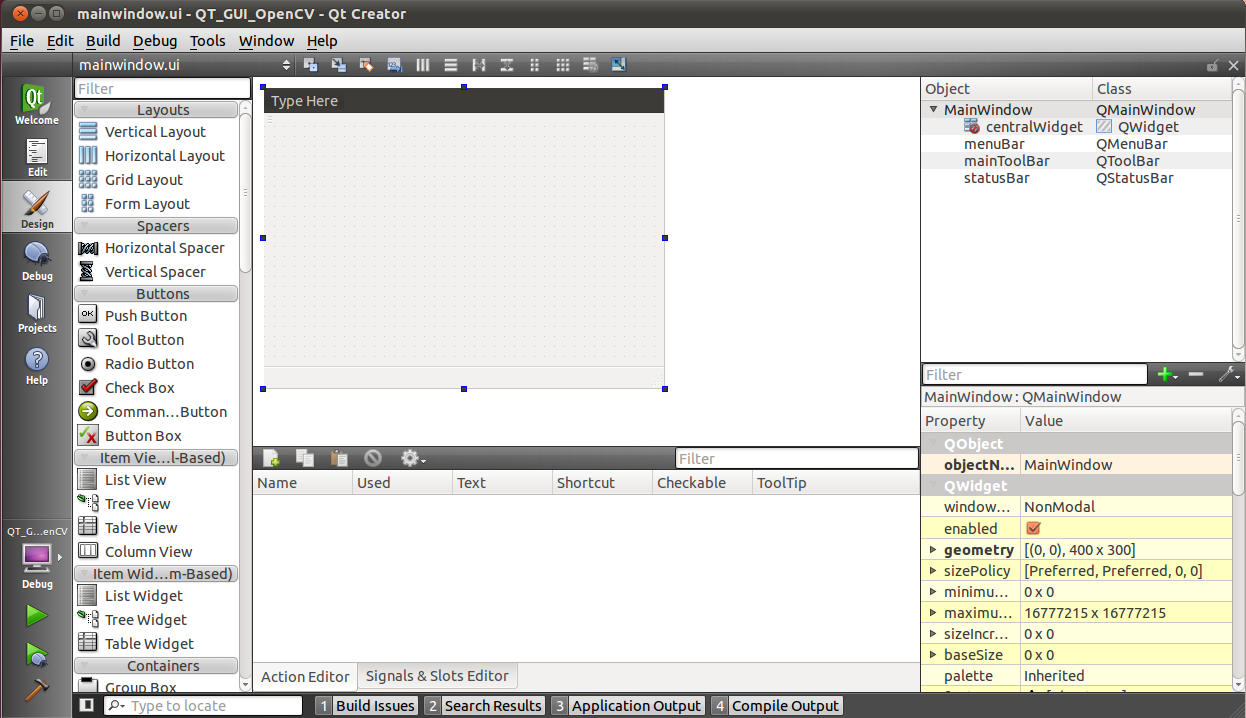
在第一篇教學中,已經簡單介紹如何使用QT如何建立一個簡單的OpenCV應用程式了,本範例將介紹如何使用QT GUI建立OpenCV應用程式。Step1:首先一樣開啟QT Creator軟體介面,如下圖所示,並點選Create Project按鈕。Step2:點選建立Qt C++ Project,並點選QT Gui Application,選取完畢之後點選choose,進行建立,如下圖所示。Step3:建立專案Step4:建立GUI介面建立專案可以使用自己喜歡之名稱,並如下圖方式輸入。補充說明:目前QT的資料管理方式為debug或是release資料夾必須與src平行,不得放於src資料夾當中,所以我們要建立一個資料夾,其中包含src、release、Debug。Name: QT_GUI_opencvCreate in :/home/trong/QT/QT_GUI_opencvSrc位於 :/home/trong/QT/QT_GUI_opencv/QT_GUI_opencvrelease資料夾:/home/trong/QT/QT_GUI_opencv/QT_GUI_opencv_releasedebug資料夾:/home/trong/QT/QT_GUI_opencv/QT_GUI_opencv_debug如下圖所示:可自行輸入Class name及相關檔頭名稱最後可管理該專案相關位置與設定,如下圖。當建立好專案之後,其畫面如下圖所示,你可使用左手編織相關ui元件進行UI建立。首先我們必須加入OpenCV相關include設定,方法與第一章相同,如下圖所示
PKGCONFIG += opencv
INCLUDEPATH += /usr/local/opencv/include
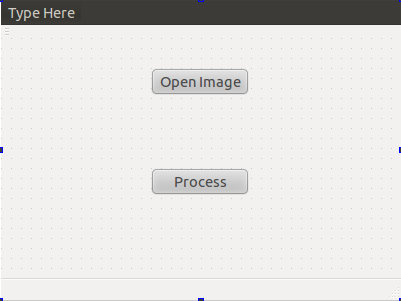
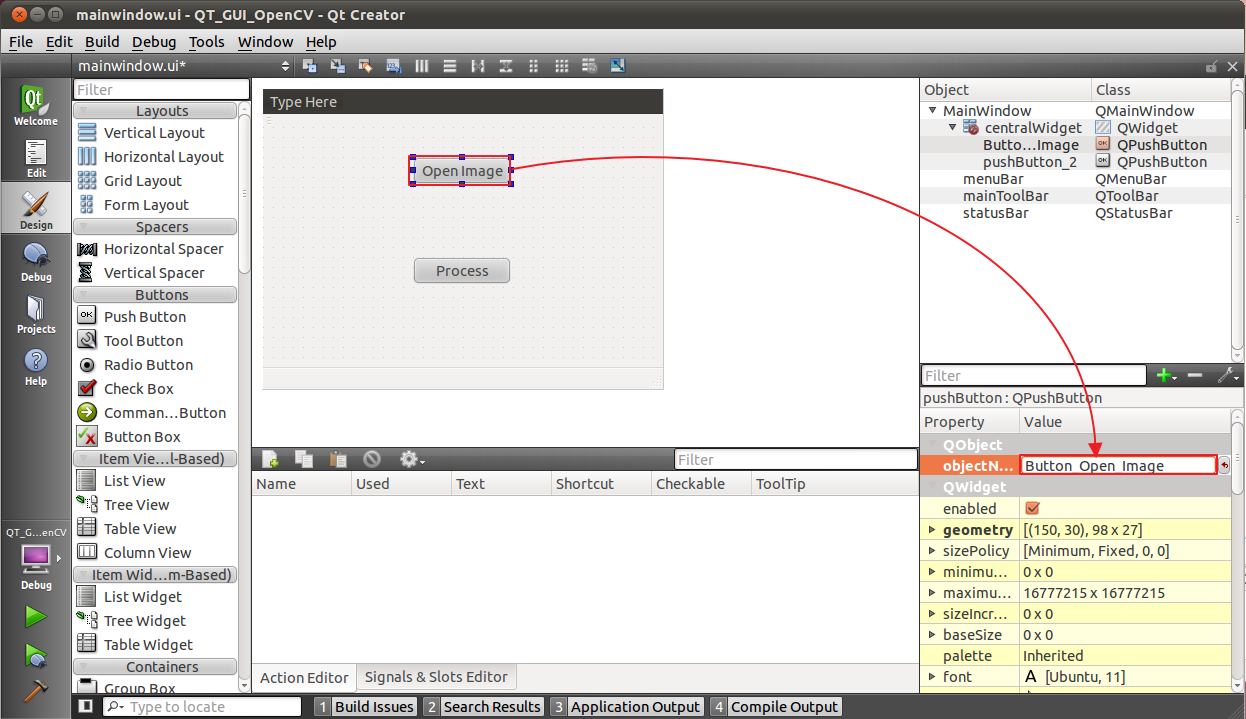
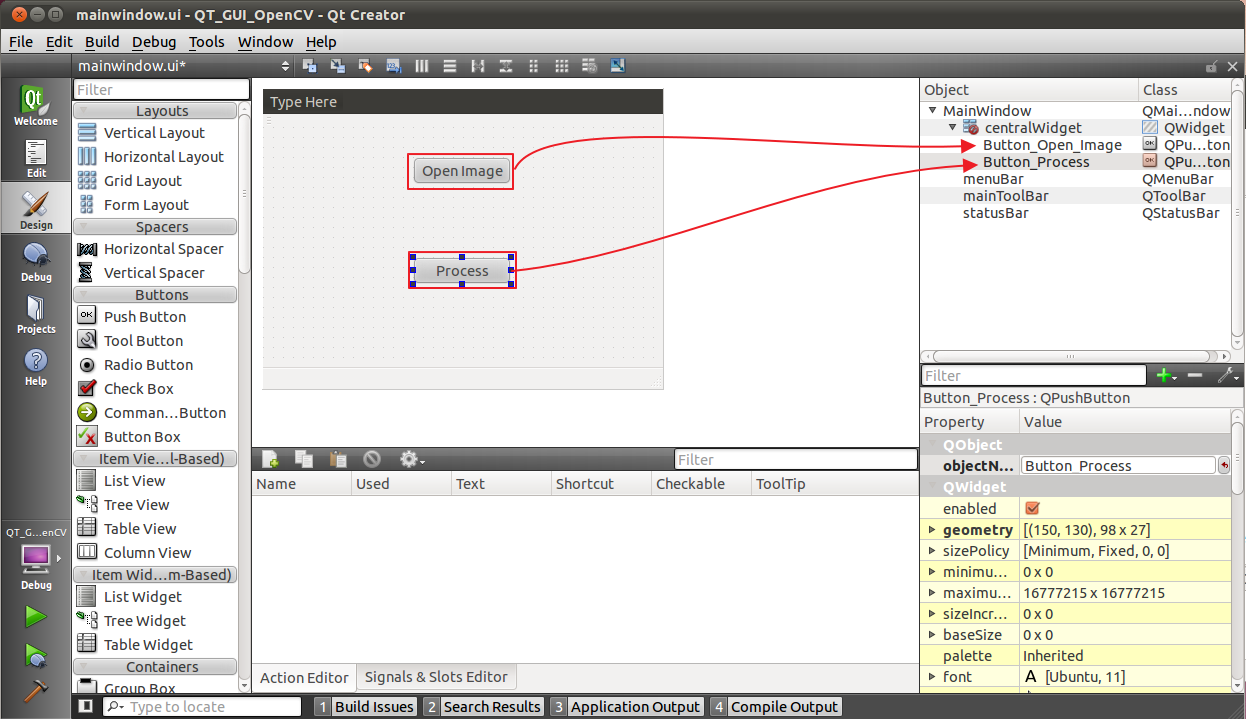
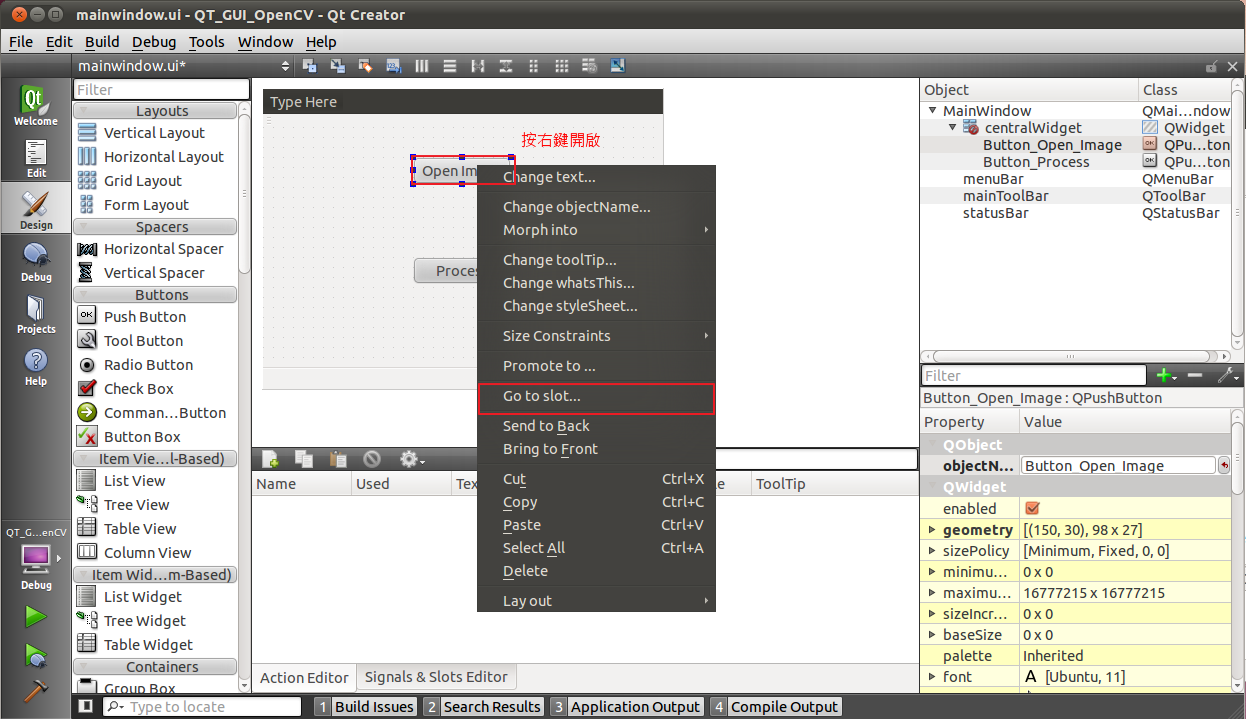
LIBS += -L/usr/local/opencv/lib -lopencv_core -lopencv_imgproc -lopencv_highgui -lopencv_ml -lopencv_video -lopencv_features2d -lopencv_calib3d -lopencv_objdetect -lopencv_contrib -lopencv_legacy -lopencv_flann -lopencv_gpu建立最簡單的方式PushButton按鈕,如下圖所示,可於PushButton中,拖拉的方式將PushButton拉至Dialog上,如下圖所示。欲修改Button名稱,可點擊Button兩下,進入編輯畫面編輯後畫面如下圖所示每個PushButton均有一個ObjectName,你可透過下圖方式進行變更。當編輯完畢之後你會發現在Mainwindow下之centralWidget中之兩個名稱也已經更改了。接下來要加入按鍵點擊之動作,點選Button並點選右鍵開啟選單,並點選Go to slot進行程式碼編輯。要新增點擊動作,請點選Clicked並點選OK進行新增。開啟後畫面如下圖所示,你將可在Clicked()進行程式碼編輯,於該區域編輯之程式碼將於點即時開啟。請再點選mainwindow.hpp進行Opencv加入,及相關函數設定,新增項目如下圖所示。
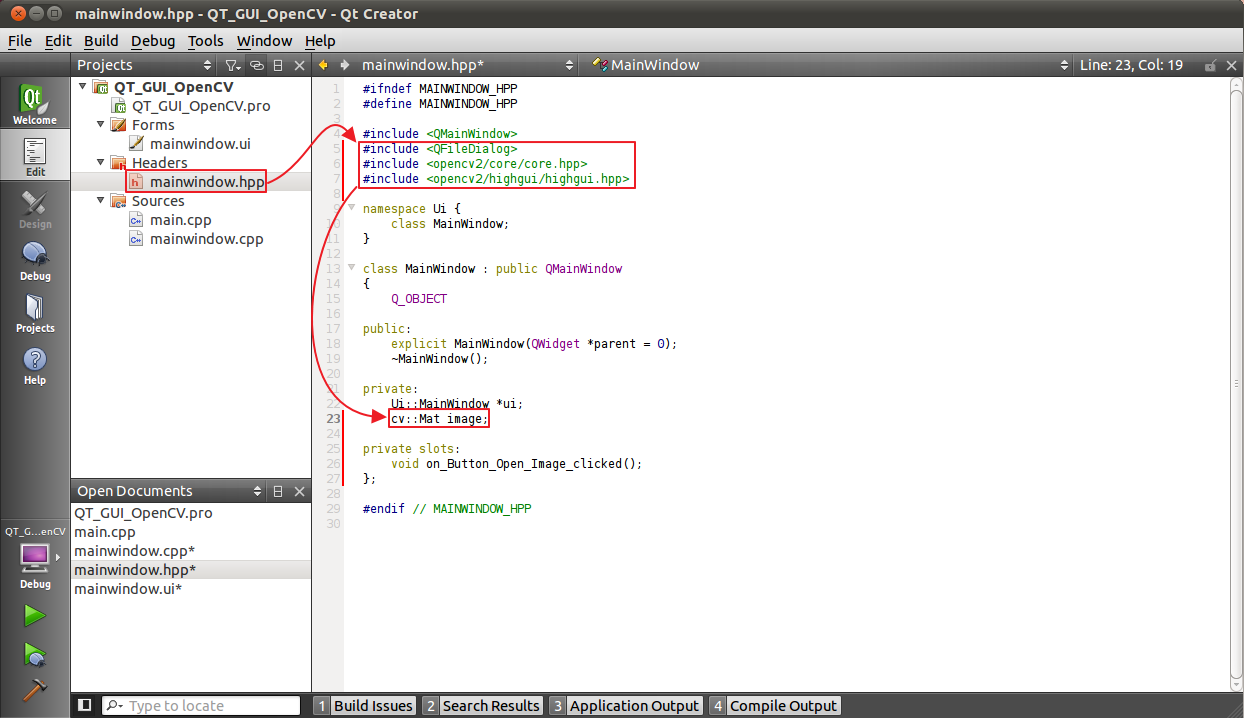
#define MAINWINDOW_HPP
#include <QMainWindow>
#include <QFileDialog>
#include <opencv2/core/core.hpp>
#include <opencv2/highgui/highgui.hpp>
namespace Ui {
class MainWindow;
}
class MainWindow : public QMainWindow
{
Q_OBJECT
public:
explicit MainWindow(QWidget *parent = 0);
~MainWindow();
private:
Ui::MainWindow *ui;
cv::Mat image;
private slots:
void on_Button_process_clicked();
void on_Button_Open_image_clicked();
};
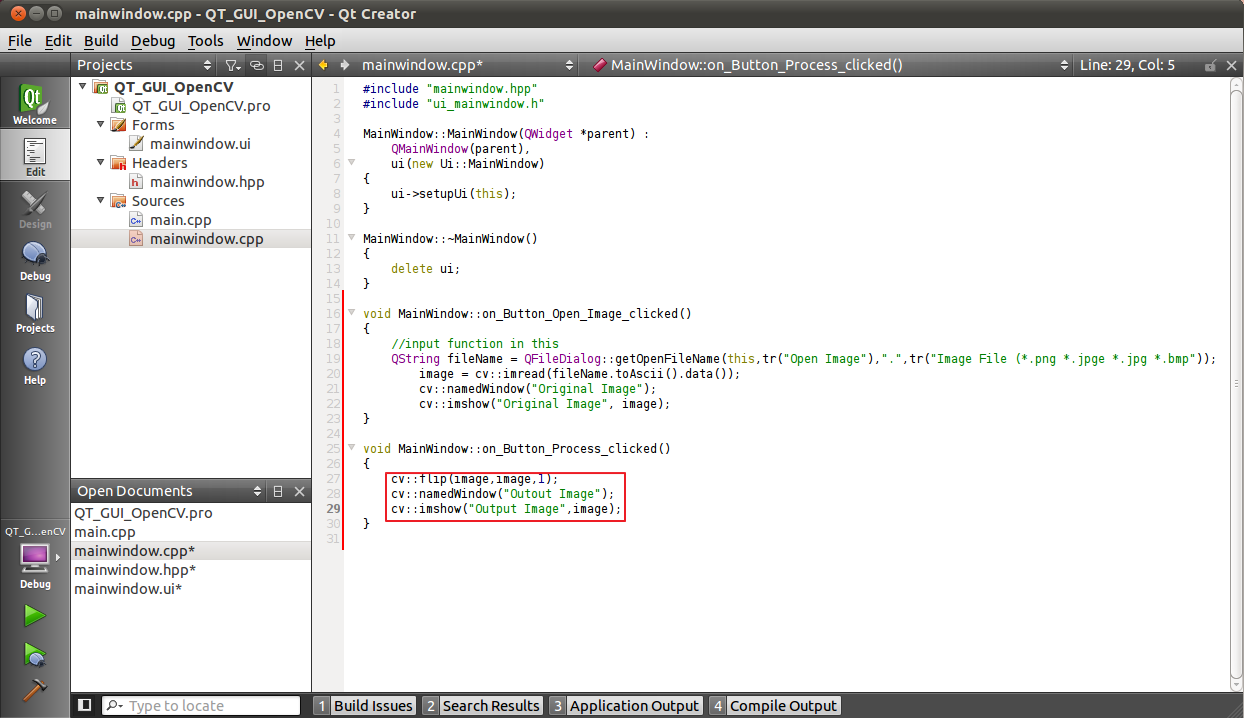
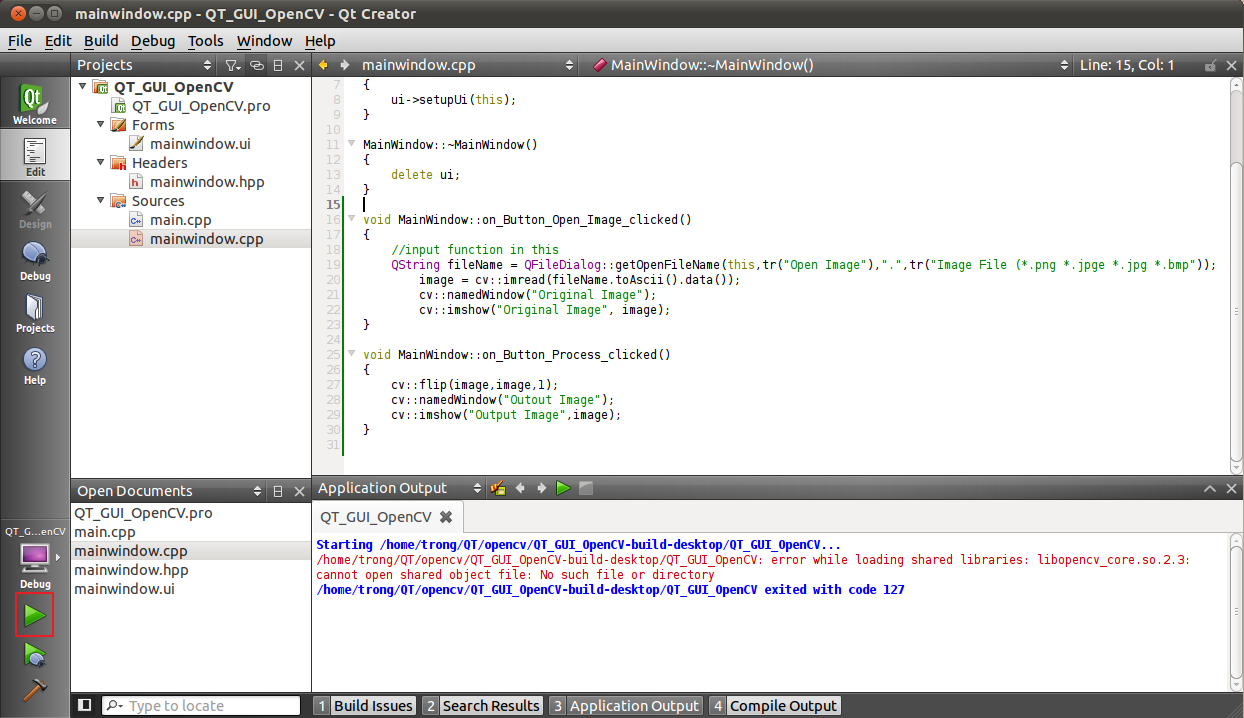
#endif // MAINWINDOW_HPP當加入Opencv相關hpp檔案之後,請再開啟mainwindow.cpp檔案,並於click按鈕屬性中加入下圖之程式碼。
image = cv::imread(fileName.toAscii().data());
cv::namedWindow("Original Image");
cv::imshow("Original Image", image);再度加入Process按鈕動作。其相關處裡程式碼如下圖所示。
cv::namedWindow("Outout Image");
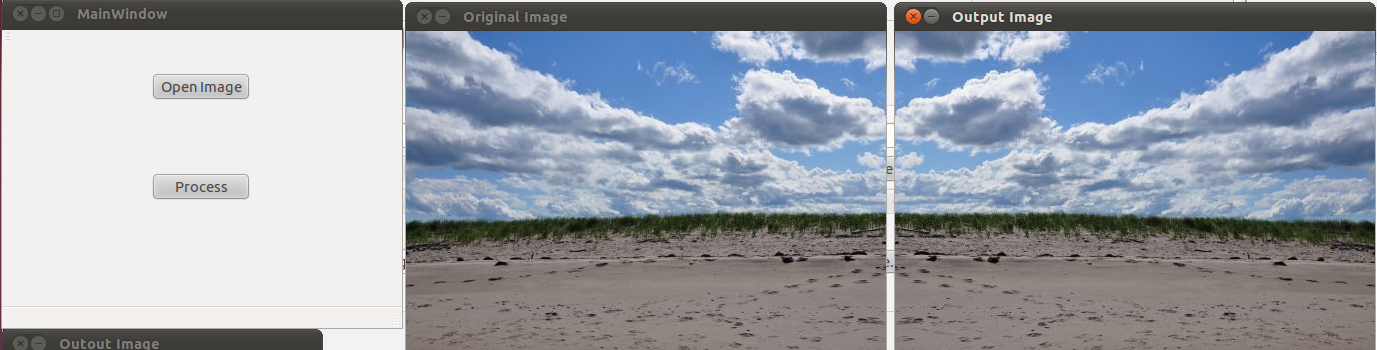
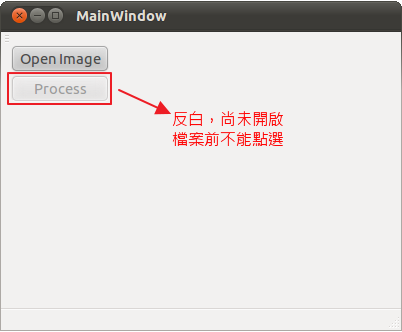
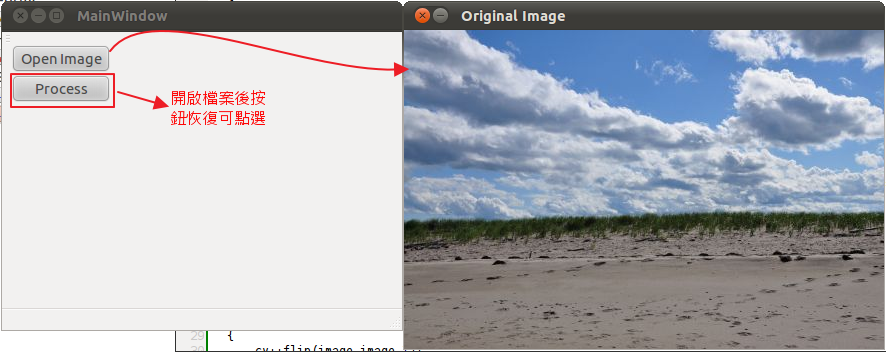
cv::imshow("Output Image",image);當確認無誤之後將可進行編譯動作,請點選下圖Debug按鈕進行編譯。Step5:測試專案到此你可利用編譯完成之程式碼進行程式動作,程式介面如下圖所示,並點選Open Image開啟影像,定點選Process進行影像水平翻轉。Step6:進階設計QT GUI介面都依賴MainWindow進行執行,若我們需要在未開啟影像時,將Process按鈕進行禁止按下的動作時,我們可以在mainwindow.cpp中之MainWindow::MainWindow中加入下圖指令,並於Open image button加入指令,如下圖所示。
關閉按鈕
ui->Button_process->setEnabled(false);
開啟按鈕
ui->Button_process->setEnabled(true);Step7:測試Step8:將影像顯示在QT視窗上再度進行編譯,並執行該編譯後的執行檔,在此可發現,若你尚未點選Open Image時,Process按鈕式反白的,此時無法點選。再點選Open Image之後,Process按鈕恢復正常,可點選並執行所設計之指令。
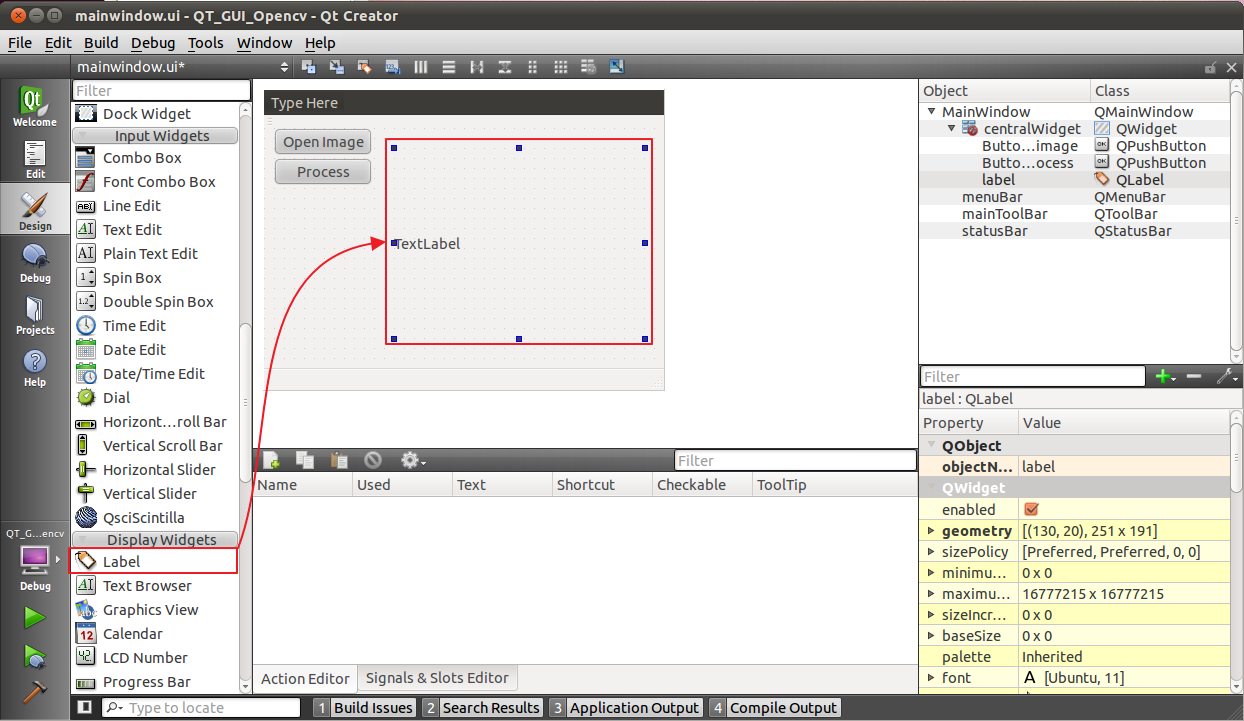
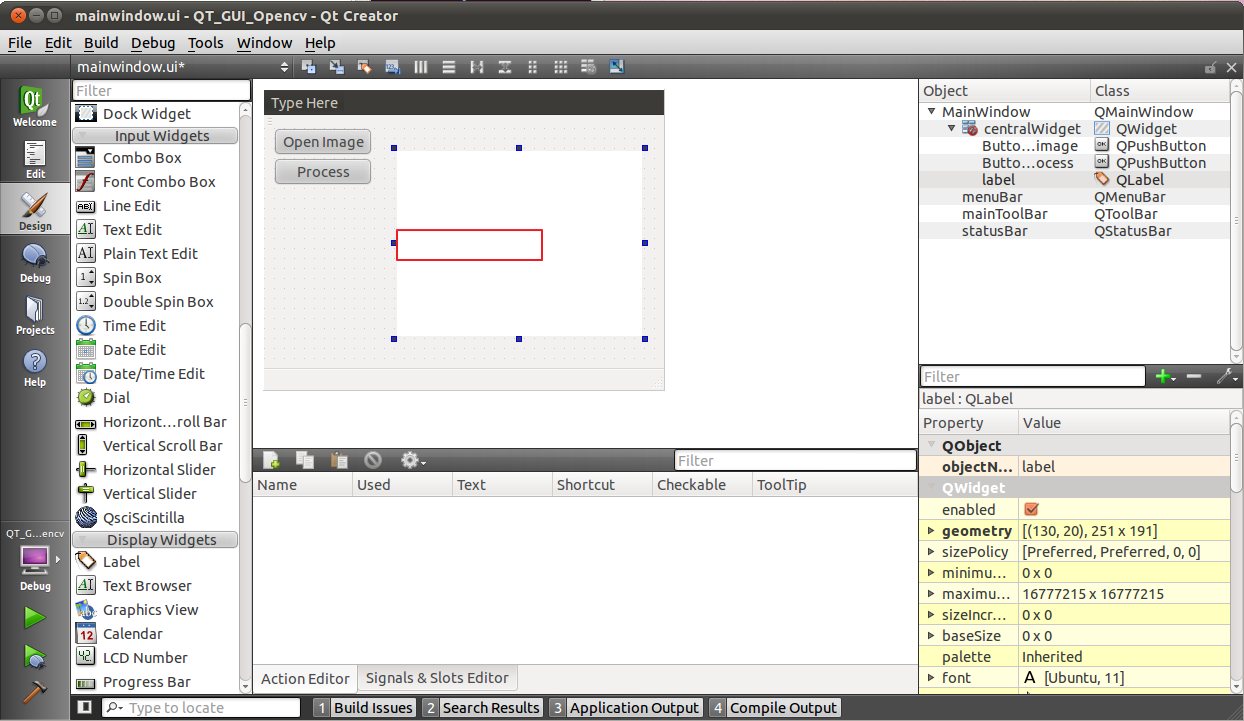
Step9:進行測試下面範例要用到cv::cvtColor,這個函數,因此需要再mainwindow.hpp中加入"#include <opencv2/opencv.hpp>"。QImage可以顯示在TexeLabel上面,因此我們先利用拖拉的方式將TextLbel新增至Dialog當中,如下圖所示。並可點選TexeLabel兩下,進行編輯文字,這邊要顯示影像,因此將文字給刪除。新增顯示於Label之方法,請開啟mainwindow.cpp檔案,並在Button_Process_clicked()函數中加入下列程式碼。
cv::cvtColor(image,image,CV_BGR2RGB);QImage img=QImage((const unsigned char*)(image.data),//Qtimagestructureimage.cols,image.rows,QImage::Format_RGB888);ui->label->setPixmap(QPixmap::fromImage(img));//displayonlabelui->label->resize(ui->label->pixmap()->size());//resizethelabeltofittheimage相同你可以點選Open Image進行檔案開啟動作,並點選Process按鈕進行影像水平旋轉及顯示於QT視窗當中,其結果如下所示。
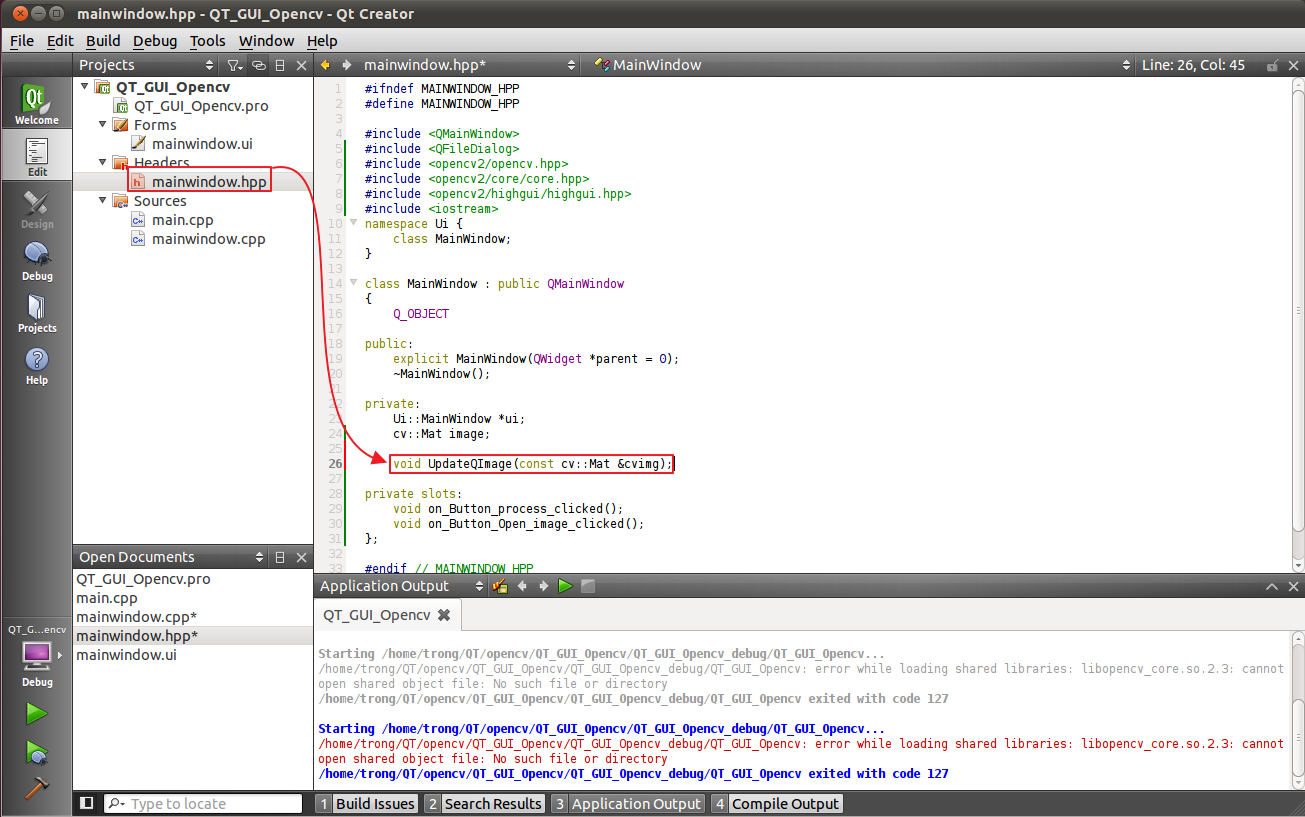
進階應用:Function在我們已經成功將影像呼叫出來,並且使用opencv進行影像處理之後,我們都要透過QImage的方式,將影像再度轉換回QT上面做顯示,這邊我們可以寫一個小小的class來管理這個轉換,讓我們有其他程式也想使用該class時,不需要再度寫一次相同的程式。首先我們開啟mainwindow.hpp檔案,並加入
void UpdateQImage(const cv::Mat &cvimg); 也就是說我們建立一個UpdateQImage的一個class,其中要放入的函數類型為"const cv::Mat &cvimg",如下圖所示。私有變數使用再回到mainwindow.cpp檔案加入"void MainWindow::UpdateQImage(const cv::Mat &cvimg)"程式,如下圖所示。相關程式碼如下:
// Convert OpenCV image to QImage.
void MainWindow::UpdateQImage(const cv::Mat &cvimg){
QImage qimg=QImage((const unsigned char*)(cvimg.data),
cvimg.cols,cvimg.rows,QImage::Format_RGB888);
ui->label->setPixmap(QPixmap::fromImage(qimg));
ui->label->resize(ui->label->pixmap()->size());
}並將"void MainWindow::on_Button_process_clicked()"中之程式修改成
void MainWindow::on_Button_process_clicked()
{
cv::flip(image,image,1);
cv::cvtColor(image,image,CV_BGR2RGB);
UpdateQImage(image);
}如此一來,只要你點選Process按鈕將會去執行filp動作,並將結果傳回UpdateQImage函數中進行顯示。上面幾個小程式中,其實我們已經使用了非常多變數了,這些變數如果你只是呼叫一次,那每次都進行宣告是無所謂的,但是如果該變數要使用非常多次呢?每次都要開一個變數來存放他嗎?其實上半部,步驟三我們就已經有定義了一個私有變數"cv::Mat image;"我們將它放在"private:"當中,定義image為cv::Mat類別之變數,這樣你只要在這個程式中使用image,你就可以去使用這個變數了。這邊簡單來說如果我們要去處理一張影像,當每次處理完之後都要再去開一個變數來存放他,這樣有再大的記憶體也不構放,因此我們在定義一個cv::Mat類別的變數,用來承接我們運算後的影像結果,請開啟檔案"mainwindow.h",並於private:加入變數cv::Mat result;,如下圖所示。加入之後,將可進行Open image button的動作修改,請開啟檔案"mainwindow.cpp",修改function"on_Button_Open_image_clicked()",將result等於原本讀取完畢的image,並利用UpdateQImage(result);來更新顯示視窗。如下圖所示。那接下來要去修改並將Button Process click指令中修改成result=IPtool.flip(result,1);,這樣的方式,以後如果有其他的影像處理方式,就可以直接沿用這個架構去執行。本次OpenCV所使用的相關函數
QT使用指令
dst – Destination image of the same size and depth as src .code – Color space conversion code. See the description below.dstCn – Number of channels in the destination image. If the parameter is 0, the number of the channels is derived automatically from src and code .The function converts an input image from one color space to another. In case of a transformation to-from RGB color space, the order of the channels should be specified explicitly (RGB or BGR). Note that the default color format in OpenCV is often referred to as RGB but it is actually BGR (the bytes are reversed). So the first byte in a standard (24-bit) color image will be an 8-bit Blue component, the second byte will be Green, and the third byte will be Red. The fourth, fifth, and sixth bytes would then be the second pixel (Blue, then Green, then Red), and so on.The conventional ranges for R, G, and B channel values are:• 0 to 255 for CV _8U images• 0 to 65535 for CV _16U images• 0 to 1 for CV _32F imagesIn case of linear transformations, the range does not matter. But in case of a non-linear transformation, an input RGB image should be normalized to the proper value range to get the correct results, for example, for RGB → L*u*v* transformation. For example, if you have a 32-bit floating-point image directly converted from an 8-bit image without any scaling, then it will have the 0..255 value range instead of 0..1 assumed by the function. So, before calling cvtColor , you need first to scale the image down:img * = 1. /255 ;cvtColor(img, img, CV _BGR2Luv);If you use cvtColor with 8-bit images, the conversion will have some information lost. For many applications, this will not be noticeable but it is recommended to use 32-bit images in applications that need the full range of colors or that convert an image before an operation and then convert back.The function can do the following transformations:
QFileDialog Class
The QFileDialog class provides a dialog that allow users to select files or directories. More...#include <QFileDialog>Static Public Members
QString getExistingDirectory(QWidget * parent = 0, const QString & caption = QString(), const QString & dir = QString(), Optionsoptions = ShowDirsOnly) QString getOpenFileName(QWidget * parent = 0, const QString & caption = QString(), const QString & dir = QString(), const QString &filter = QString(), QString * selectedFilter = 0, Options options = 0) QStringList getOpenFileNames(QWidget * parent = 0, const QString & caption = QString(), const QString & dir = QString(), const QString &filter = QString(), QString * selectedFilter = 0, Options options = 0) QString getSaveFileName(QWidget * parent = 0, const QString & caption = QString(), const QString & dir = QString(), const QString &filter = QString(), QString * selectedFilter = 0, Options options = 0)
example
 fileName = QFileDialog::getOpenFileName(this,
     tr("Open Image"), "/home/jana", tr("Image Files (*.png *.jpg *.bmp)"));
If you want to use multiple filters, separate each one with two semicolons. For example:"Images (*.png *.xpm *.jpg);;Text files (*.txt);;XML files (*.xml)"
2012年5月13日 星期日
[Qt] - Creating a CUI application using Qt


訂閱:
文章 (Atom)